| Black List, the time has come to destroy our enemies! Go capture their base camp! - Black List's Announcer at the start of the game. |

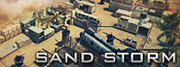
Sand Storm is a close quarter combat and second Wave Mode map, sets within a small base in the middle of the desert. This map is available in some versions:
- Sand Storm (Most Versions).
- Sahara (Brazil).
- Desert Storm (China).
Map description[]
Opposed to the large open-fielded that is Snow Base, Sand Storm is a much smaller territory. Taking place within a desert base, Global Risk and Black List face each other heads on with the center serving as their break point. Each team has a total of two Towers, one armored Truck and one Satellite, and there is no quick way to get to the enemy's base. All towers must be destroyed before the Satellite can be taken on.
Gimmicks[]
| The enemy got the laptop! Brace from the airstrike! - When Global Risk lost the Airstrike Call from the enemy. |
This map still uses helicopter supply drop off to help both team with their objectives. It will drop two random items out of five that needs to be captured in order to use it. Two of them are from Snow Base, one is a recurring item from that map as well; adding only two new items specifically for this map:
- Mortar: Dropping at one random spot; it will give the team three mortar bomb, which should be mainly used against enemy towers. This item only appears when one team loses a single tower in order to balance gameplay.
- Energy Transmitter: This laptop enhance friendly NPCs soldiers, thus giving them more health points so they can distract enemies and their towers longer. Towers now exposed, the team may attack the tower more easily.
- Airstrike Call: Instead of the fourty NPCs kills, it is now taking the form of a small laptop within a supply crate, which once captured will allow the whole team to send airstrikes signals to a designated area of their choice.
- Health & Armors: Dropped separately, they refill everyone's HP and/or add 1000 AC, depending on which one was dropped and captured. These are used as soon as they are captured and apply to any alive players.
Once a team loses their second tower, a new drop zone will be available near that team's base to keep it balanced. When one team is being pushed back, it is unlikely that they will be able to further advance, due to the map being small. Therefore, not destroying their second tower and sneak around to get the armored truck might be an option.
Tips & Strategies[]
Note that this map is very different from Snow Fort, so players should take accounts of some facts to consider about.
- Killing enemies now reward 15 EXPS while killing NPCs only reward 5. Try to finish opponents instead of letting him get away for some NPCs.
- Due to its small size, Shotguns are recommended on this map. Juggernaut and Marksman work well, while Medic, Blaster and Shock should provide supports from distance. Panther and Shield are useful when rushing supply boxes and should not be underestimated.
- In early waves, don't fight too hard on the supply boxes, as they don't contain anything too deadly aside from Airstrike call, which can be easily avoided by moving into the tunnels. If the other team overpowers yours, just send one or two guys to mess them up, while the rest try to rush the towers instead.
- Mortar and Energy Transmitter will arrive at around 4-5th supply boxes, remember that to counter your opponents. It's best to hang back and keep your power to get those boxes rather than trying to fight off the enemies and competing for the boxes with a sliver of health left.
- Always rush Supply boxes closer to opponents' base first, because it will likely contain useful gimmicks (Laptop or Mortar). The one at the center can wait, and if possible, try to fool enemy players into taking them instead.
- Because of Sand Storm's small size, it's important to get the Energy Transmitter; as your opponents won't have space to get away from your NPCs. If the oppositing team get it, try to remove it ASAP otherwise the NPCs will overwhelm your team.
- If possible, do NOT destroy the second tower. This will trigger a new drop spot near the enemy team's base, which they can easily defend if your team is not strong enough. Most of the time they can get Mortar and turn the table around.
- Try to sneak and invade an enemy to kill them as soon as possible even they are inside the tower's defenses to take an opportunity to obtain experience points. Since the map has only one lane and the enemy camp sends out 4 AI-Soldier per lane every 30 seconds , it's not enough for your team to gather experience points in early time.
- When being killed by a tower , the last player that inflicts damage on you will count on them as assist instead of receiving them as kill. Meaning they can only obtain the partial amount of exp compared to a successful kill. This trick will take longer time for the enemy to gather more experience points until they reach Level 5.
Glitches[]
- In CF Vietnam, CF North America, Sand Storm's Tactical map has a wrong Y position, which is a bit higher than where it's supposed to be. When firing Mortars at the Towers, the shoots will end up not reaching the Towers and deal much less damage. It's recommended to aim ABOVE the Towers icon so the shoots can land exactly on the Towers and deal maximum damage.
Trivia
- Unlike Arctic Base that starts at Level 1 , this map starts at Level 3 instead.
Gallery
")
.jpg "SandStorm (2).jpg (102 KB)")
")
")
")
")
")
")
")
")
")
")
")
")
Video[]

CrossFire VN - Sand Storm (Wave Mode)
Sand Storm gameplay (Speedrun)

Cross Fire China Sand Storm(沙.漠风暴) (Wave Mode) GamePlay !
Sand Storm gameplay (CFCN)